背景
当我们的页面内容和我们的标题需要强关联的时候,我们的电梯导航就出现了,我们可以按照双向滚动绑定进行实现,如我们经常使用的在线文章编辑器中的编辑区和实时预览区域,让两者内容滚动双向绑定达到关联,但是今天实现上面的这种效果,我要请出的是这个重要的角色来实现,那就是锚点。
强大的a标签
a标签对于我们网页开发者来说,我们是再熟悉不过了,其作用一个是链接到外部页面,一个是链接本地页面,还有一个是方便读者的锚点链接,还有一些新的功能,比如打电话和发送邮件,弹出QQ对话框等等。而今天要分享的就是这个锚点,来看一个例子
<div style="position: fixed;top:20px;right: 20px">
<a href="#part1">第1章</a>
<a href="#part2">第2章</a>
<a href="#part3">第3章</a>
<a href="#part4">第4章</a>
<a href="#part5">第5章</a>
<a href="#part6">第6章</a>
</div>
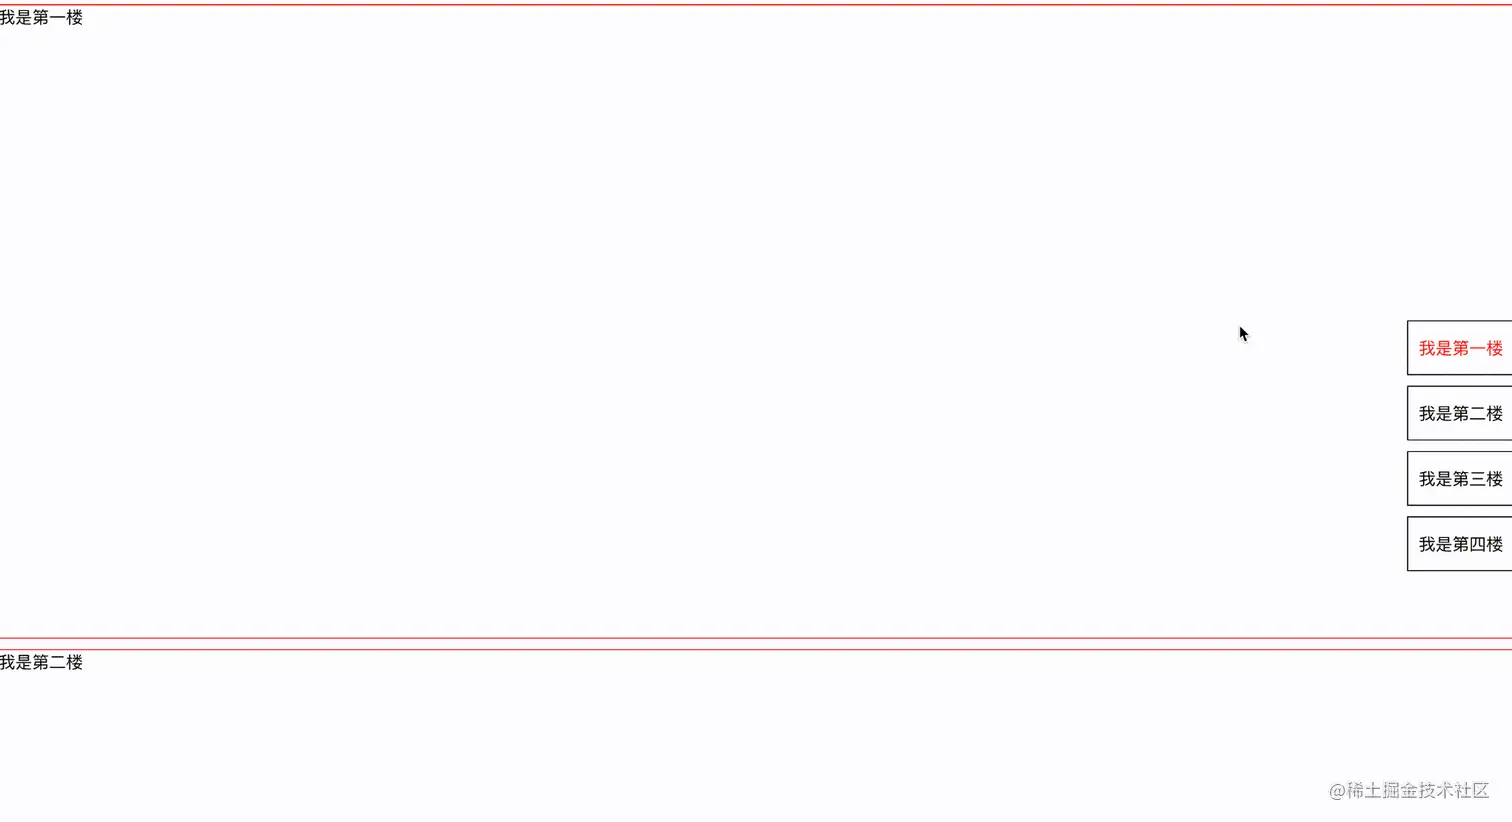
熟悉选择器的看到#肯定已经想到了,对,锚点定位就是通过元素的id属性进行定位,因为元素的id属性是唯一的,所以锚点可以锚到这个唯一的地方,此时当我们点击a标签,页面就会自动跳转到页面中有对应id的地方了,如下:
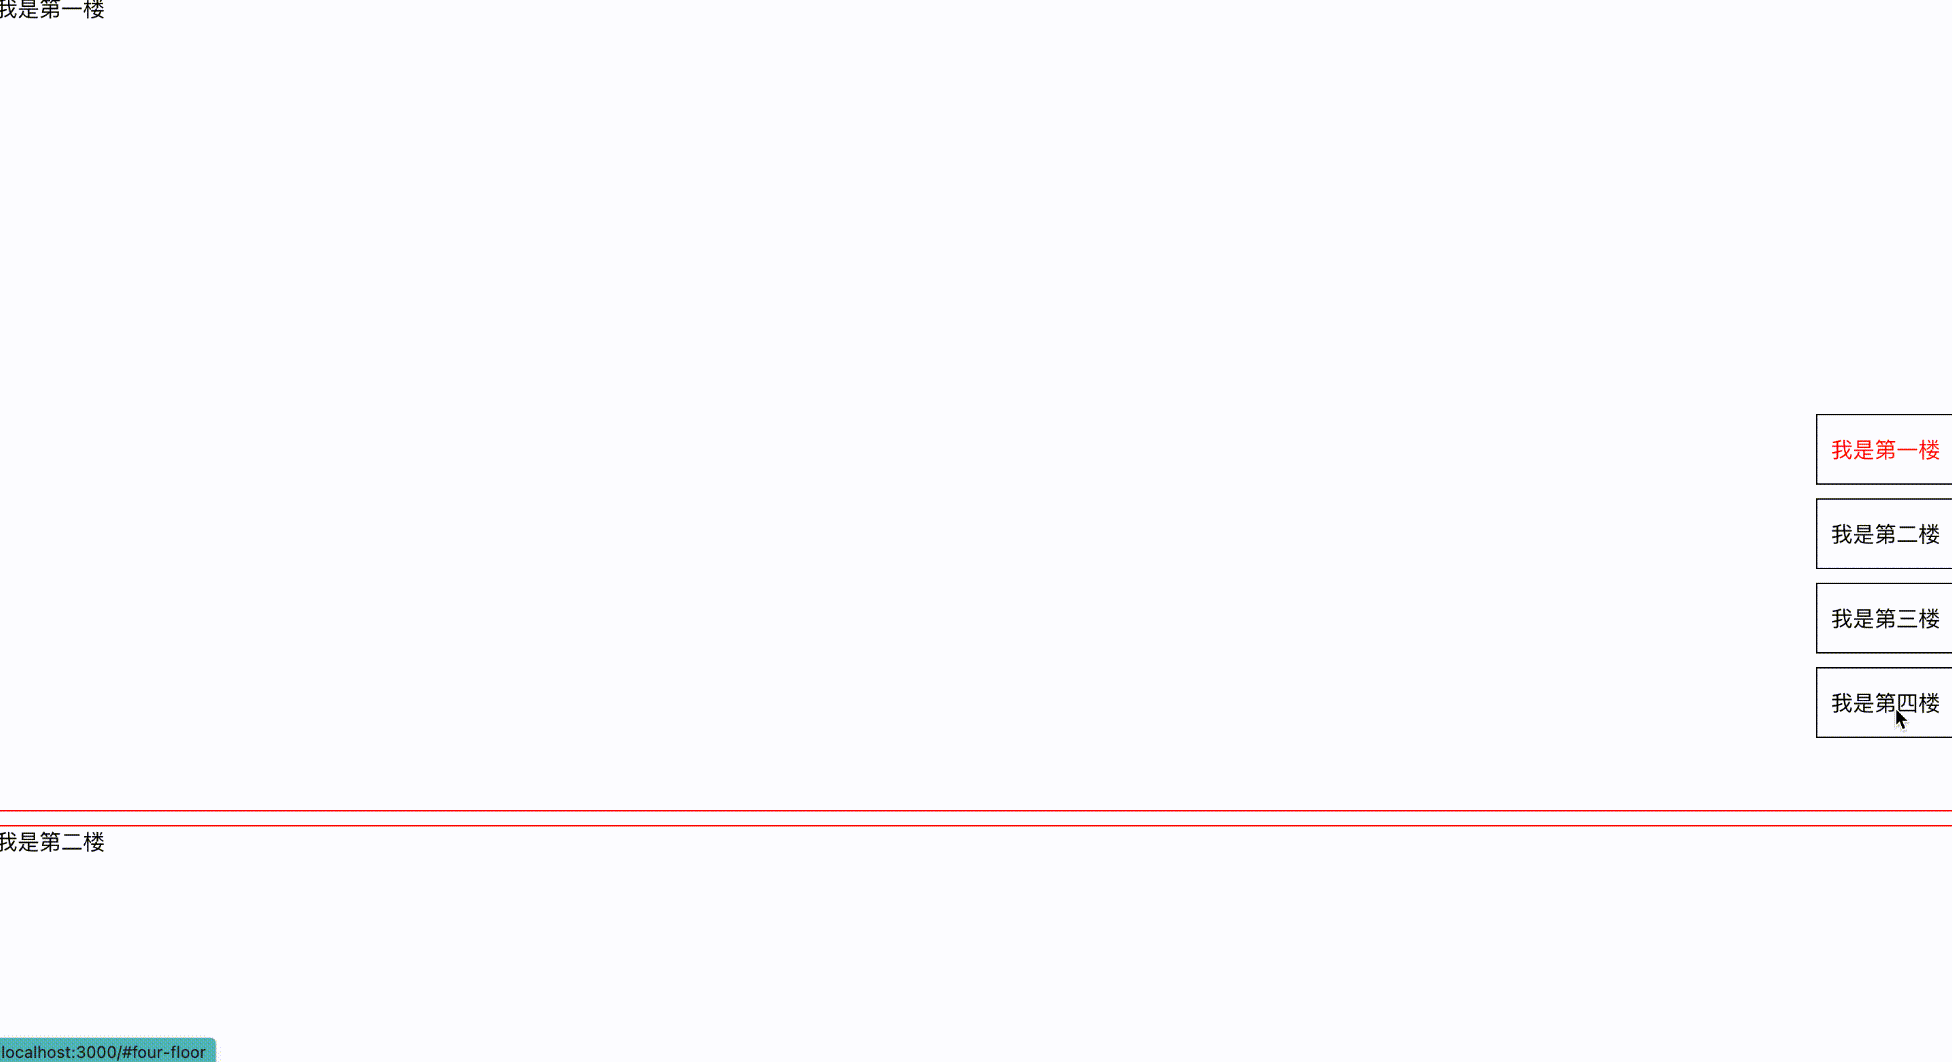
但是可以明显发现这和我们开头实现的效果有区别,就是没有那么丝滑,我们只需要在滚动元素加上scrollBehavior: 'smooth' 即可。
实现功能
其实在上面的内容中,我们已经借助元素的默认动作,完成了demo中的一半内容了,就是通过点击标题跳转到对应的内容提,接下来就是通过内容到标题,我直接先上完整代码,再来慢慢解释:
import React, { useEffect, useRef, useState } from 'react';
const FloorItems: {
  key: string;
  content: string;
  name: string;
}[] = [{
  key: 'first-floor',
  content: "我是第一楼",
  name: '第一楼'
},
{
  key: 'second-floor',
  content: "我是第二楼",
  name: '第二楼'
},
{
  key: 'third-floor',
  content: "我是第三楼",
  name: '第三楼'
},
{
  key: 'four-floor',
  content: "我是第四楼",
  name: '第四楼'
}];
type OffsetTopType = {
  id: string;
  offsetTop: number;
}[];
function App() {
  const [offsetTopList, setOffsetTopList] = useState<OffsetTopType>();
  useEffect(() => {
    const offsetTop: OffsetTopType = [];
    FloorItems.forEach((item, index) => {
      const curDom = document.getElementById(item.key);
      curDom && offsetTop.push({ id: item.key, offsetTop: curDom.getBoundingClientRect().top })
    })
    setOffsetTopList(offsetTop);
  }, []);

  const [activeBar,setActiveBar] = useState<string>(FloorItems[0].key);


  const ref = useRef<HTMLDivElement>(null);
  const onScrollEvent = () =>{
    if(offsetTopList && ref.current){
      for(let i = offsetTopList.length - 1; i>=0;i--){
        if(ref.current.scrollTop +400 >=offsetTopList[i].offsetTop){
          setActiveBar(offsetTopList[i].id);
          break;
        }
      }
    }
  }
  return (
    <div>
      <div
      style={{
        overflow:'scroll',
        scrollBehavior: 'smooth',
        height: '100vh'
      }}
      onScrollCapture={onScrollEvent}
      ref={ref}
      >
        {
          FloorItems.map(item =>
            <div
              key={item.key}
              id={item.key}
              style={{
                height: '600px',
                border: '1px solid red',
                margin: '10px 0'
              }}
            >{item.content}</div>)
        }
      </div>
      <div style={{
        position: 'fixed',
        right: '0px',
        top: '300px'
      }}>
        {
          FloorItems.map(item =>
            <a
              key={item.key}
              href={`#${item.key}`}
              style={{
                height: '50px',
                width: "100px",
                border: '1px solid black',
                margin: '10px 0',
                backgroundColor: '#fff',
                display: 'block',
                lineHeight: '50px',
                textAlign: 'center',
                textDecoration: 'none',
                color: activeBar === item.key?'red':'black'
              }}
            >{item.content}</a>)
        }
      </div>
    </div>
  );
}

export default App;
关键方法就是这个:
const onScrollEvent = () =>{
    if(offsetTopList && ref.current){
      for(let i = offsetTopList.length - 1; i>=0;i--){
        if(ref.current.scrollTop +400 >=offsetTopList[i].offsetTop){
          setActiveBar(offsetTopList[i].id);
          break;
        }
      }
    }
  }
当我们滚动的时候,我们倒序遍历所有内容,如果滚动距离+偏移距离(偏移距离是因为最后一个楼层不能触顶,所以其和视口顶端会有一定的距离时,其实已经是到底了)大于我们元素到顶部的距离说明此时已经到了当成的这个元素来,进行选择态的更改即可。


